How to Fix a Sticky Kinesis Advantage Keyboard
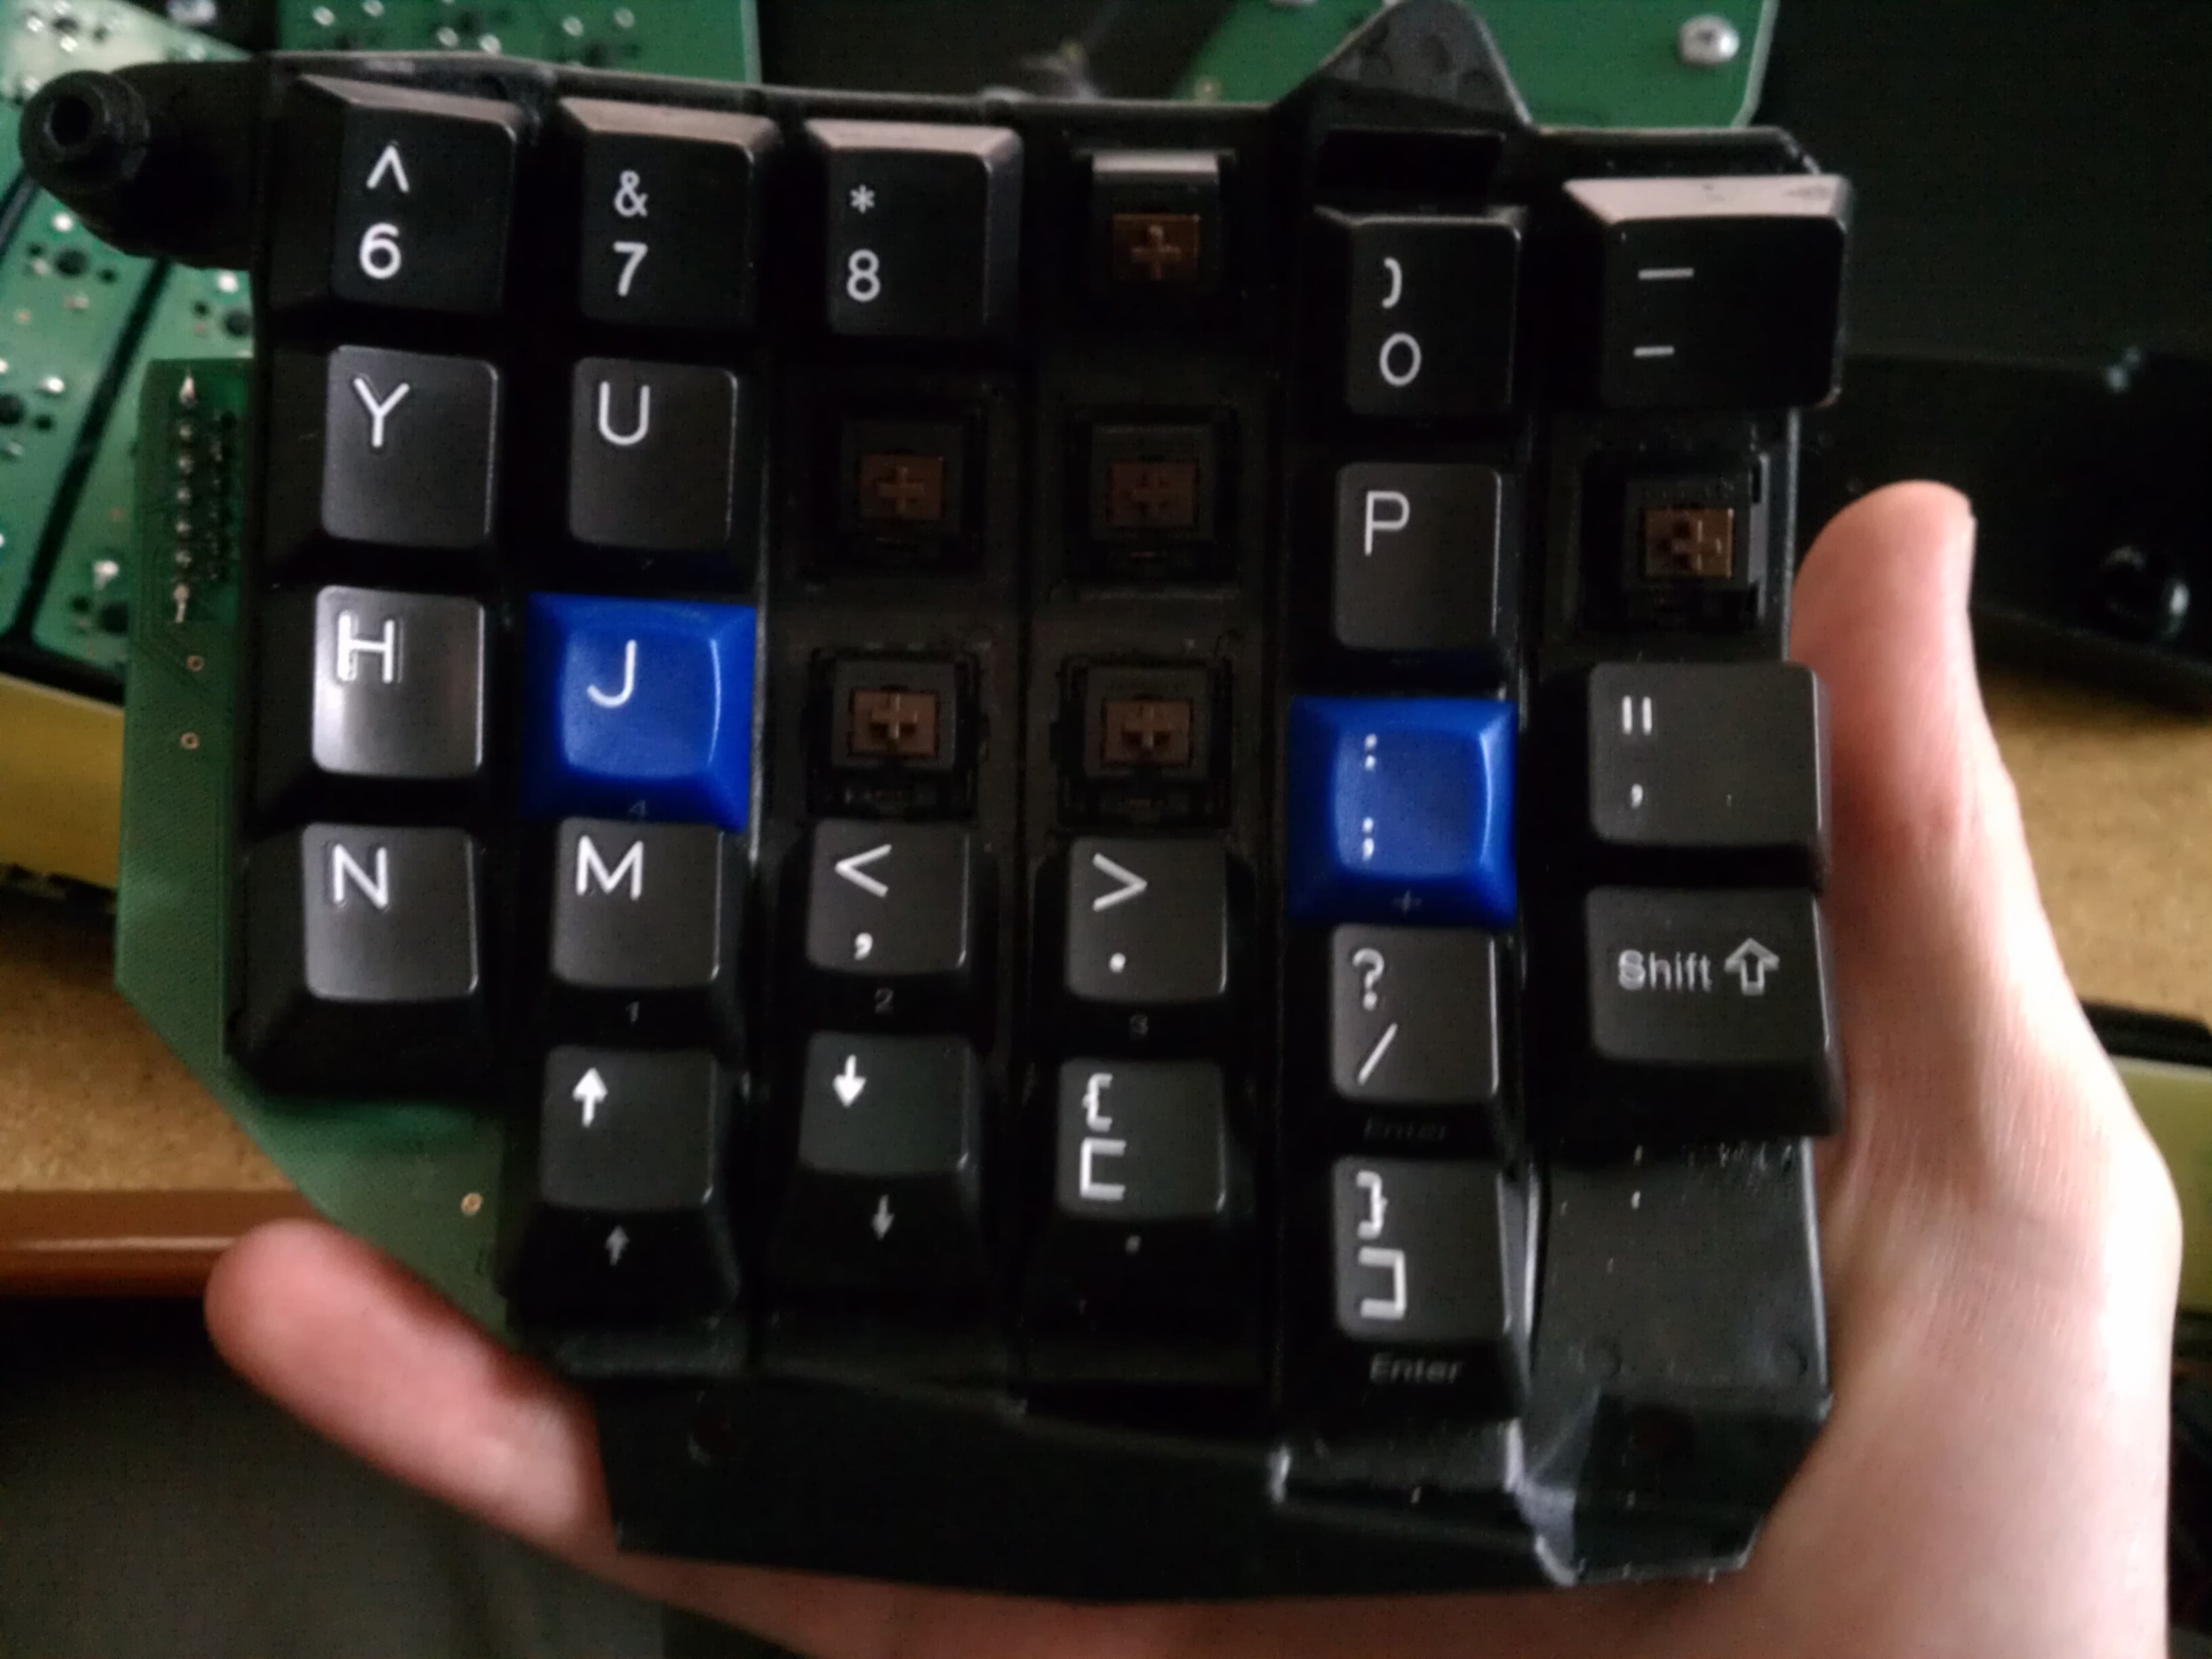
I opened a soda near my keyboard and it blew up all over the right side. Now you might be thinking “no big deal,” but I have had some RSI issues so I use a $300 Kinesis Advantage, which, if you have RSI problems, is simply amazing. It, along with Workrave, has almost completely solved my problems.
So, my keys were sticking. Bad day. I popped the keys off with their included tool, and wiped them down, but that only cleared up the issues for about 10 minutes. You can send yours in for a few weeks and like $50-80 and they’ll fix it, but I decided to give it a shot.
Step 1) Take it apart. Relatively simple. A few screws on the back and you’re set.

Step 2) Take out the side that you’re having issues with. A few more screws and one ribbon cable and it will come off

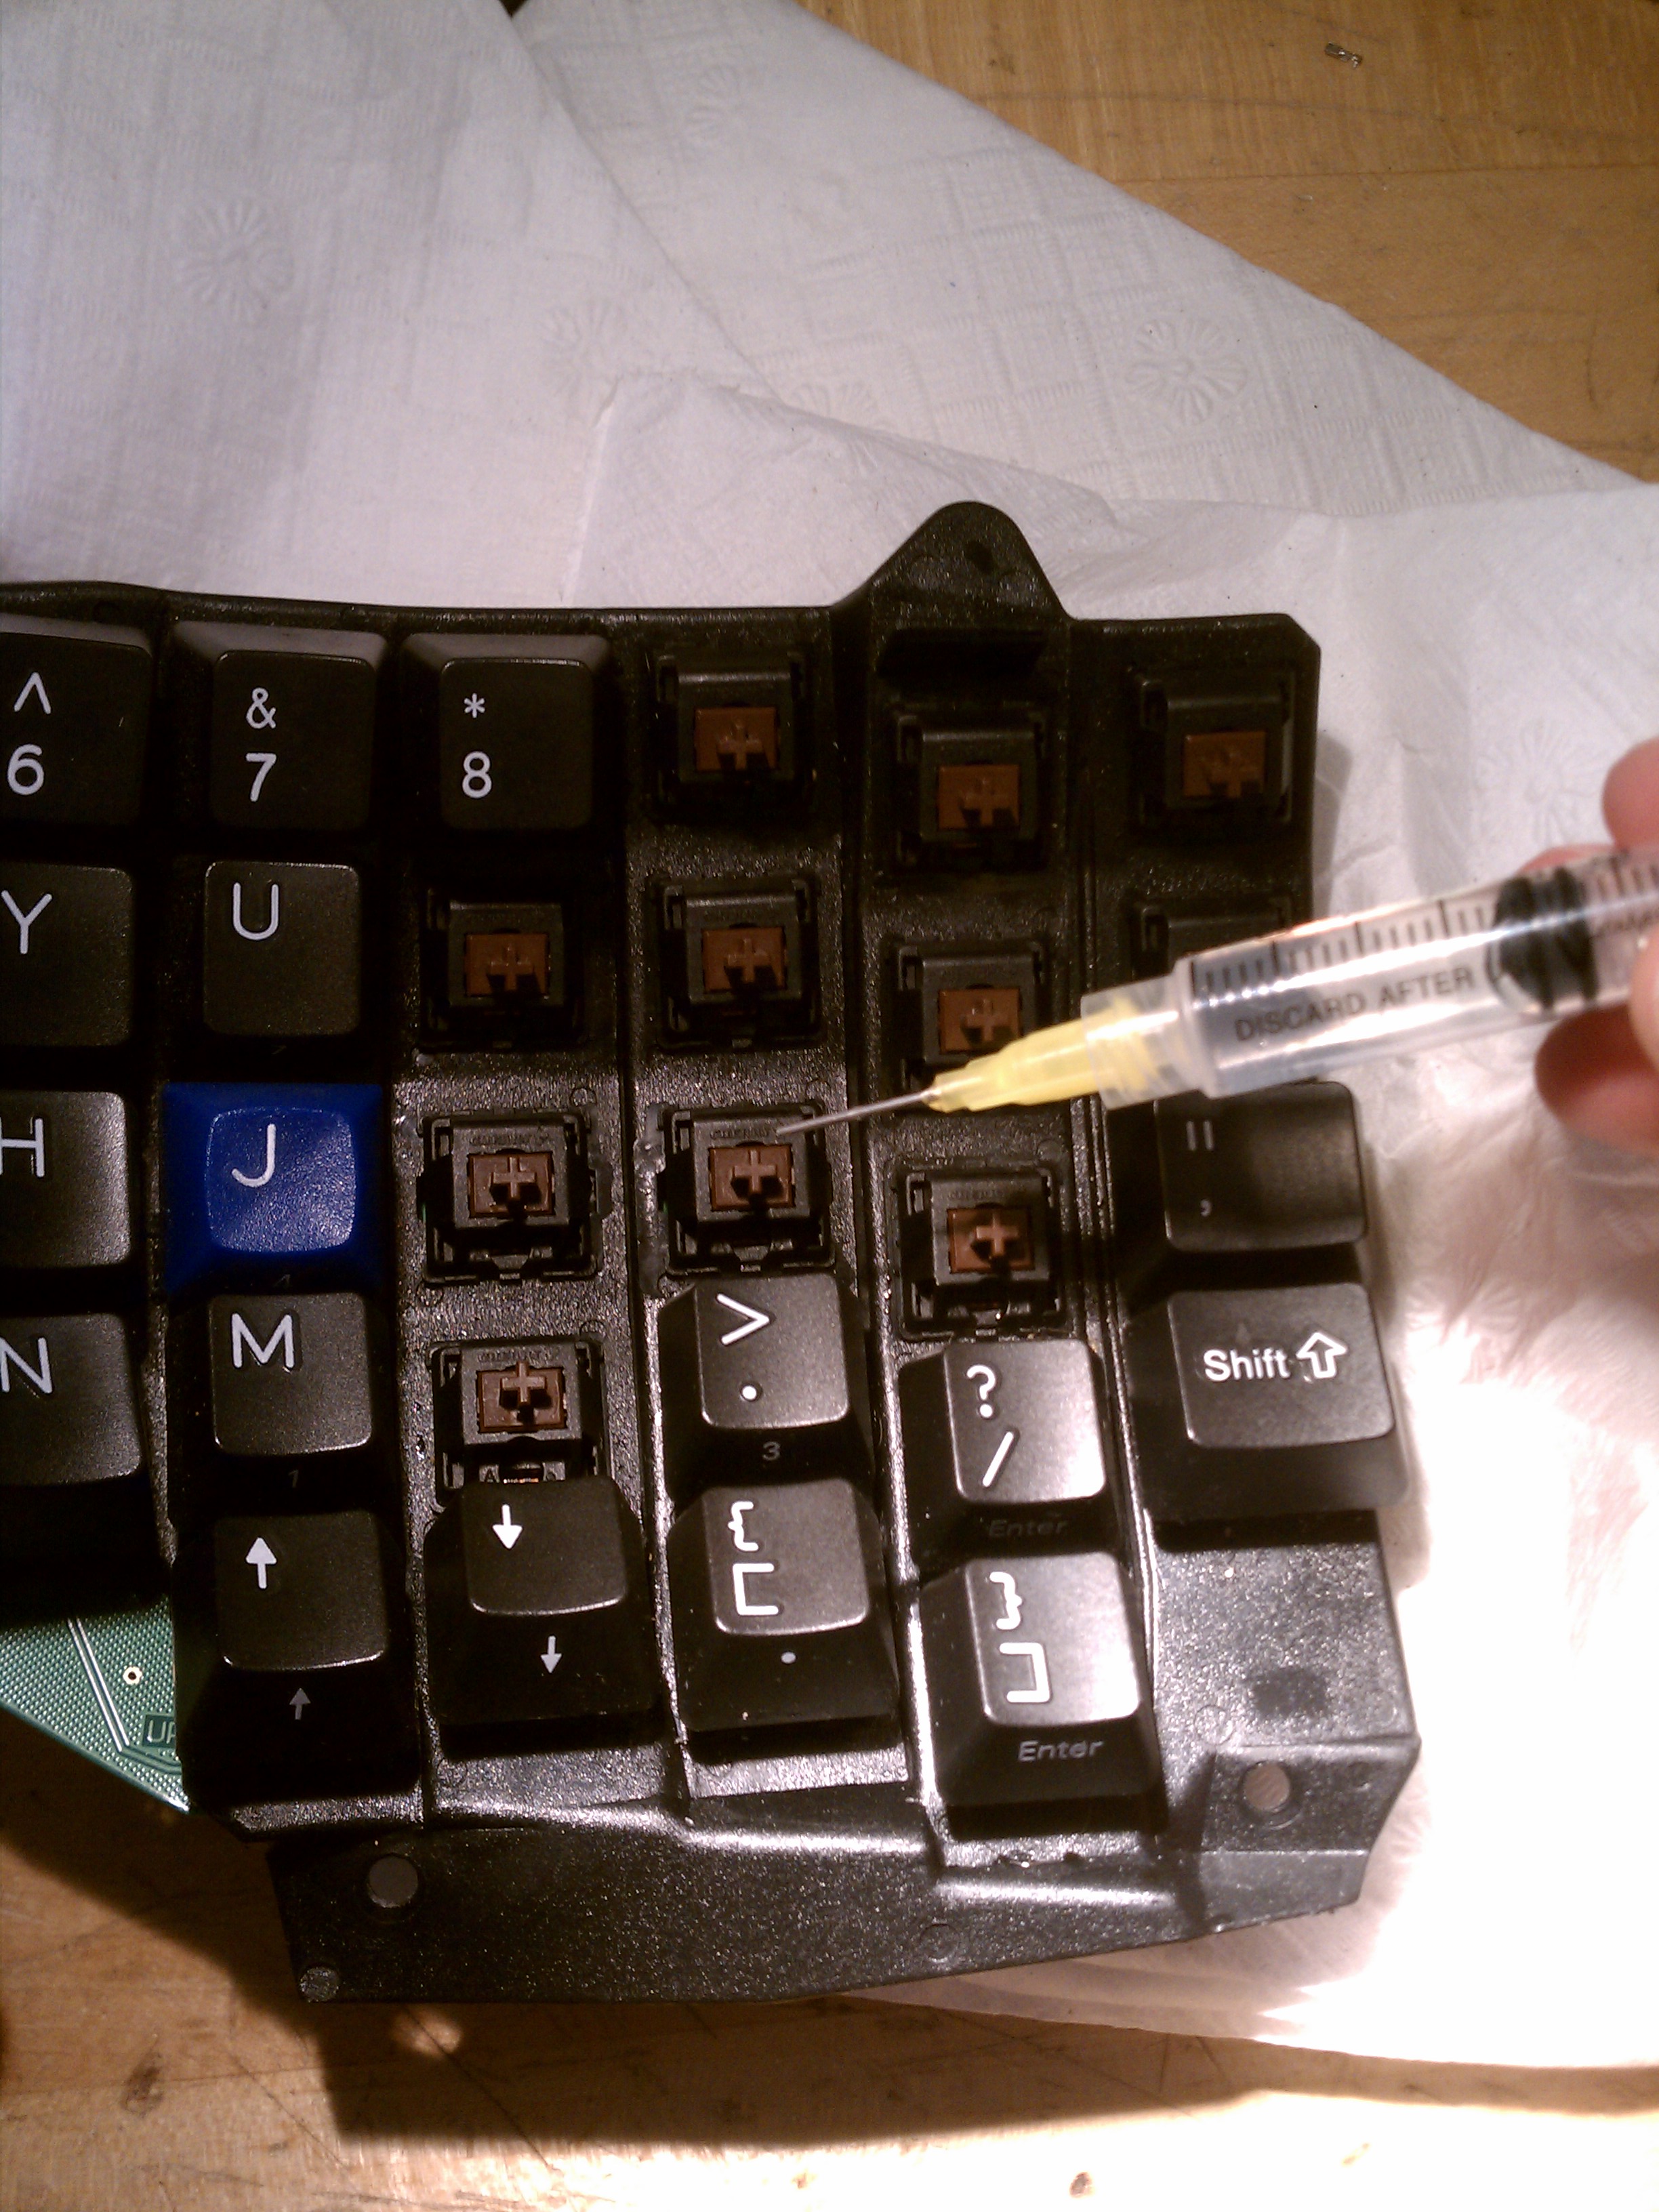
Step 3) Get a syringe, fill it with water, and very carefully press the Cherry switch down and put a few drops of water inside. As soon as the water is in, flip the board over and shake while holding the switch down. Then use compressed air to blow out the water, all the while holding a napkin under the switch to absorb anything that comes out.

Step 4) Dry it with a heater or leave it for a while. I dried mine, put it back together, and almost all the keys worked. I turned out I hadn’t pushed the ribbon cable all the way in, so make sure you do that. Typing on it now as good as new!
Update: I’ve had to repeat this process a number of times now as keys that weren’t stuck have become stuck. I recommend cleaning most of the keys in the affected area all at once so you don’t have to keep opening up the keyboard.
Update 2: I’ve had to repeat this process about five times on the keys to get them unstuck (drying, then washing, then drying, etc.) Each time everything seems to be a little bit better. I’m crossing my fingers that I’m in the clear now.
Update 3: Seems to be working well now.
Update 4: Continued to have problems after a while. Next I took the right circuit board out (as pictured above) and put it in a warm bowl of water for a few minutes. I worked each key (with the keycaps off) and then dried it out. So far this has been the best solution yet, and the keyboard has survived its trip.
Update 5: After Update 4, the keyboard has been working without any issues for over a year.
02/8/13